This case study comes courtesy of Gary who was looking to create some off-road parking at his home in place of his currently steep and unused front garden which you can see a photo of. It would be a lot of work to build up the area to become level but with the right products and hard work it could be done. Gary decided that he wanted a gravel driveway to replace his front garden but was wary of gravel migration so began searching for a suitable gravel grid.
Read on to see what products Gary decided to use and the work he had to complete to create his new gravel driveway:
Gary had a plan in place of how he would build up his driveway (which we will cover later on) before needing to install a gravel grid, so he ensured he had all of the necessary tools and materials to complete this before searching for grids. Once he had everything in place, Gary began searching online for a strong gravel grid that would prevent gravel migration and that he could install himself. After a little browsing he came across our website and our X-Grid®.
Gary began reading up on the many fantastic benefits our X-Grid® comes with such as: able to withstand up to 420 tonnes per sqm, quick and easy to install, UV and weather resistant, permeable, very competitively priced and is made from 100% recycled plastic in the UK.
Gary soon ordered 30m² of X-Grid® which was delivered to his home via pallet delivery just 3 working days later ready to be installed once the prior groundwork was completed.
You can follow Gary’s installing through the photos included in this blog.
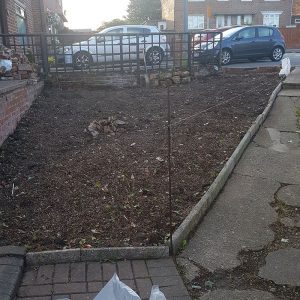
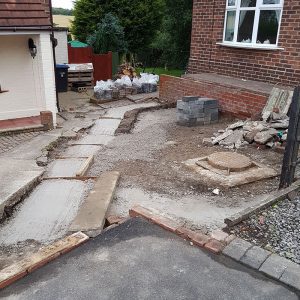
First, Gary started by removing all of the existing soil in the current front garden and either moving it into his back garden or disposing of in his garden waste bin. With the soil gone, a solid surface was left exposed ready to be built up on.
Secondly, Gary removed the concrete ramp which was next to his front garden and instead installed steps using concrete. With the left over concrete, he filled in divots that were present in the now exposed floor of the front garden.
Thirdly, Gary began his brickwork using house bricks on the outside and breeze blocks on the inside for added strength and built a wall using the existing border of the front garden as a guideline. Around every 2 or 3 bricks, he filled the area with a hardcore material before compacting and levelling as well as he could. He continued this process until the entire wall was complete and the hardcore base was built up to the third or fourth brick from the top.
With the wall completed, Gary turned his attention to the steps and laid more concrete on top of the existing step outlines to create sharp and level steps.
Next, Gary used more hardcore for the last time and filled the entire area up to 50/60mm from the top of the brickwork. After laying the hardcore it was again compacted and levelled before a sheet of membrane was laid over the entire area to allow water to drain away naturally and stop anything from growing up and through his grid.
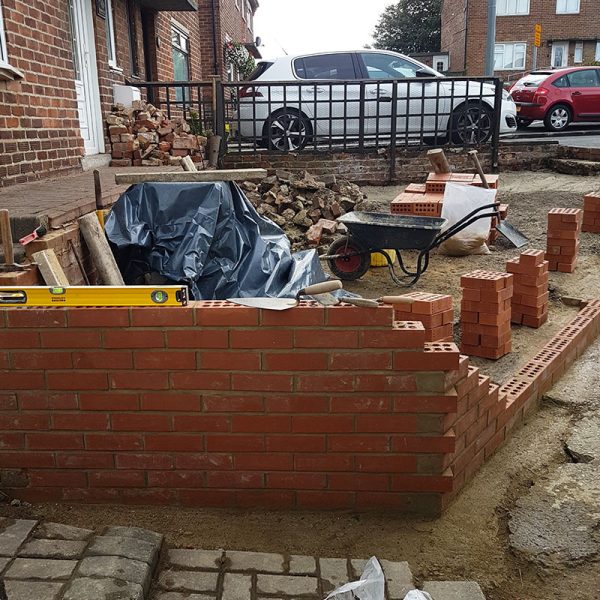
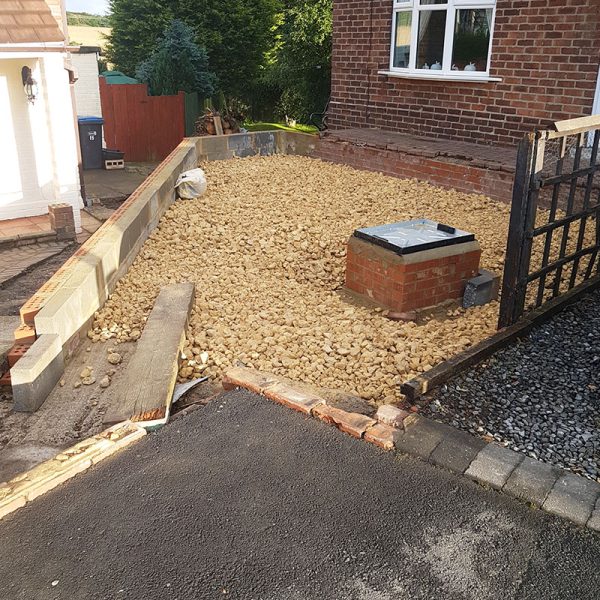
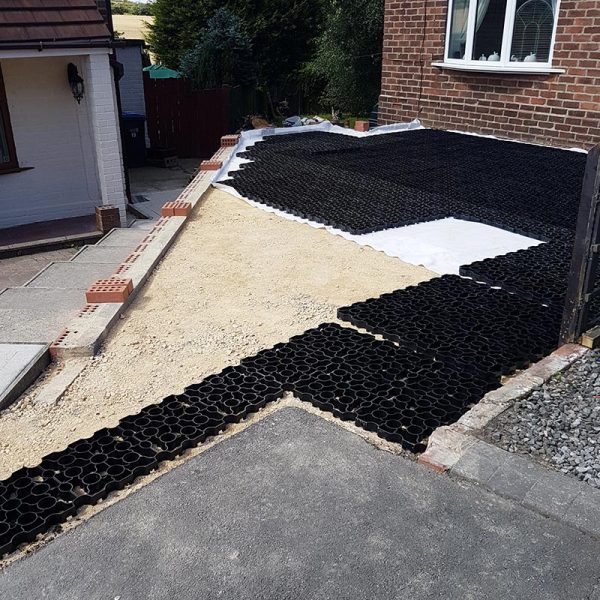
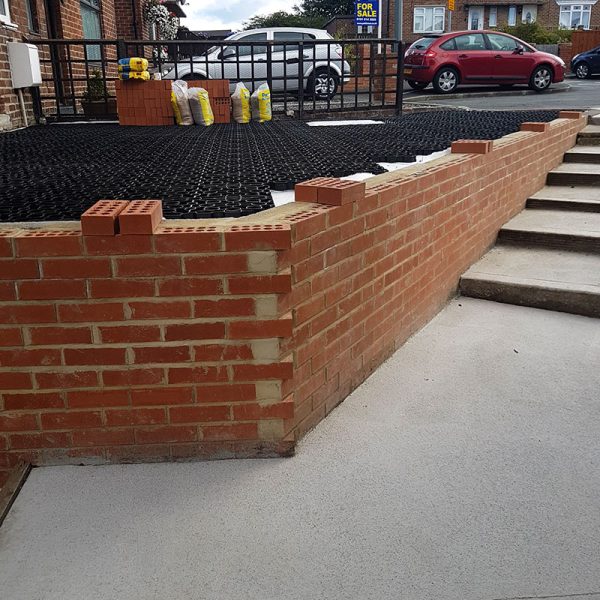
Once the membrane was in place, Gary could begin laying his X-Grid®. He started in one corner of the driveway and laid 9 panels at a time by simply connecting each neighbouring grid together using its specially designed slot and peg system. This took no time at all even with Gary having to lay individual pieces towards the end to fill the smaller areas of his new drive.
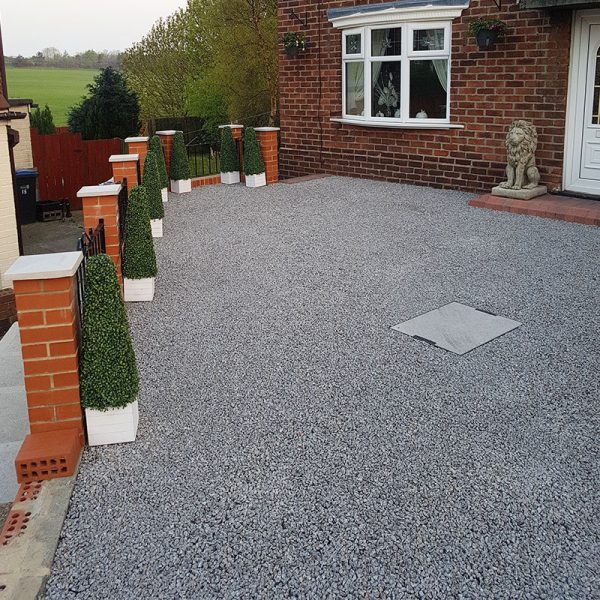
X-Grid® in place, Gary could now fill the entire area with his decorative grey gravel. Around 8kg of gravel is needed to fill each individual panel so you can work out roughly how much you will need to fill your entire area. Again this took no time at all to complete and Gary could begin parking his car on his new drive despite the finishing touches not yet being completed.
Finally, after all this work Gary still had some more work to do. As you can see in the previous photos he marked out using two bricks along the wall where he would build up pillars and install a black metal fence in between each pillar before buying 7 plants to place in front of each pillar to complete the installation.
After weeks and weeks of work, Gary’s X-Grid® Gravel Driveway was complete and it looks outstanding!
A huge thank you to Gary for choosing to use our X-Grid® and for sharing the photos of his project to allow us to create this case study. He is delighted with his new X-Grid® gravel driveway and we’re not surprised, it looks fantastic and all of the work he has put in to complete it has been more than worth it! He told us:
“It took some time before we finally decided on the gravel we wanted but because of the X-Grid® I was still able to park without any problems. We have had loads of people enquiring about what X-Grid® was and what its use is”
“I cannot praise X-Grid® enough and I am always recommending it to people. We are over the moon with its performance and the extra stability they have given our drive.”
If you have photos of your project to share with us or have questions regarding any of our products then please do not hesitate to contact us.